FAST USA 2-5 DAYS SHIPPING
Measuring and Mixing Epoxy Resin – Top Tips on How to Mix Epoxy ( GUIDE )

Epoxy resin kit come as a two part system: Part A – Resin and Part B – Hardener. Mixing these two components together prompts a chemical reaction between resin and hardener, transforming them from a liquid mixture into a solid.
The resin mixing instructions are very imporant to making sure you get the perfect results. Measuring and mixing epoxy resins accurately and safely is a must skill for any artist or woodworker to making sure your epoxies cures properly!
The right produce for mixing resin will determine success or failure in processing. After deep research to achieve the best results, we have compiled the best 10 tips on mixing and measuring epoxy resin for you!

There are 5 simple steps when measuring and mixing resin to ensure a curing success and perfect pour:
- Choose your Resin ( not all resins mix the same ).
- Safety – make sure you have the proper tools and safety equipments before working with resin. ( Supply checklist ).
- Determine how much epoxy resin you will need (by weight or by volume).
- Measure your BALTIC DAY resin accurately.
- Mixing Epoxy Resins.
STEP 1: For this Tutorial, we will use BALTIC DAY CRYSTAL CLEAR EPOXY RESIN. Our Resin kit includes 2x Measuring Cups, Plastic Spreader, 20x Wooden Sticks, Pair of Nitrile Gloves and mixing directions. High-gloss resin specifically designed and formulated to give artwork and art projects a crystal clear finish. It's a two-part resin made up of a resin and a hardener. Our Resin casting systems are specially designed for a specific 1:1 mix ratio between part A and part B. Baltic Day resin works perfectly with our resin dye colorants
.
STEP 2: Epoxy Resin Safety Precautions
Using epoxy resin is a creative way to make jewelry, paintings, art and craft projects. Part of beginning of any project, make sure you are aware of the epoxy resin safety precautions, have the essential supplies, items and equipments for using and handling resins.
- Wear Disposable Latex or Nitrile Gloves – protect your hands from the sticky resin and hardner liquids. We recommend to use Nitrile gloves, they are stronger than latex and least likely to react with your skin. If you accidently get resin on your skin, use baby wipes or promptly wash it off with pumice or exfoliant soap and water. DON'T USE ALCOHOL OR ACETONE TO REMOVE RESIN FROM YOUR SKIN!
- Wear Safety Googles.
- Work in a well ventilated area. Open a window, turn on your ceiling fan or use other fans to keep the air moving. Wear a respirator if your work space have a poor ventilation.
- Clean Mixing Cups ( avoid supply that held fats/oil ).
- Clean Mixing Sticks are a great way to make sure you get your resin thoroughly mixed.
- Measuring or Disposable Cups – getting accurate measurements on your resin ensure it will cure correctly!
STEP 3: Determine how much epoxy resin You'll need
Not sure how to calculate how much epoxy resin do you need? It's simple!
Determine as close as possible the total volume of mixed material you'll need. If your art projects requires more resin, you can always mix a second batch to finish off the project.
The correct mixing ratio - when mixing epoxy resin, you should know that there is different type and ratio resins that have specific mixing ratio depending on the manufacturer. 1 : 1 ratio, 2 : 1 or even 3 : 1 specifications of resin and hardener can be complicated. For this reason, always ready the manufacturer's instructions on the packaging carefully before starting mixing. If you do not follow instructions, the resin may not cure completely.
From this point, break it down into the equal amount of Part A - resin and Part B – hardener. BALTIC DAY resin is a 1:1 epoxy resin adhesive, and requires equal amounts of both components in order to catalyze and cure.

Ambient temperature during pouring and curing
Resin reacts sensitively to temperatures. It's very important to know, as heat is one of the main factors for the success. The ideal woking temperature for working with Baltic Day resin is 23-30C or 70-85F Celsius.
Cold temperatures below 20 degrees or 68F will cause resin to become thick and full of micro-bubbles. The curing of the resin will slow down considerably. The resin may also crystallise at too low temperatures so precautions during the cold weather such as water baths for unopened resin and hardener bottles or heaters to increase room temperature are one of the main factors for success.
After about 10-25 minutes sitting in warm water, carefully dry off your bottles before you open them (mixture can cause resin to cure cloudy). Note: warming your resin may shorten your working time by 10-15 minutes.
Temperatures higher than 20 degrees or 68F will react faster at temperatures above 20 degrees. This will reduce the pot life as wel as the time until resin will cure completely.
If you will use resin outdoors, curing time will be longer if the temperature drops during the night. This can negatively effect the quality of the surface of the material.
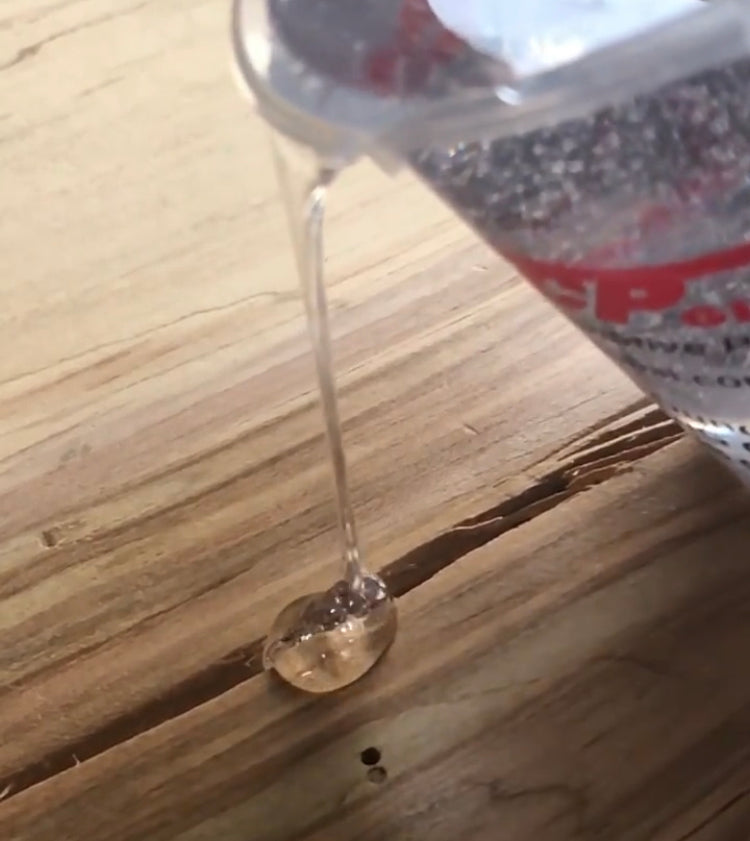
STEP 4: Measure your BALTIC DAY resin accurately
Once you've prepped your work surface and determined how much epoxy resin you will need, pour equal amounts by volume of resin and hardener into a plastic mixing cup ( make sure you have measurements cups with well-marked graduations ).
Measure carefully ( adding too much or too little of resin or hardener will not cure properly ).
Let's say you have a piece of artwork that is 1 feet x 2 feet ( 12'' x 24'' ). Total combined epoxy resin required is 10oz: 5oz of resin and 5oz of hardener. Test by starting pouring 5 oz of resin into the mixing cup, then 5 oz of hardener ( total 10 oz ). The BALTIC DAY 16 oz kit is the perfect amount you will need.

Measuring epoxy resin by weight using a digital scale
1. Scales measure in grams or ounces. Begin by powering on your scale, ensure that you have chosen a unit of mesurement that can help you determine Grams or Ounces. The quantity cannot be too small for the scale otherwise it will be hard to get consistent mixtures ( we recommend 1 ounce resin and 1 ounce hardener ).
2. Reset the scale to zero.
3. Pour your mixture first and remember the amount poured.
4. Calculate the exact amount of hardener you need based on that amount of epoxy resin.
5. Pour in your hardener, directly to the mixture. The scale may resets due to inactivity before you will complete the mixture. Each part has different densities which means that epoxy weights more than the hardener.
Measuring epoxy resin by volume
Each resin is different, depending on the manufacturer, resin and hardener may differ in density ( they do not have the same weight ). If these two components are measured by weight using a scale and mixed in a ratio of 1:1, the actual mixture may be incorrect because of different weights. Note: Always use a measuring cup to measure two parts by volume when mixing components.
Professional tips For Success:
- Don't use lid caps, kitchen spoons or plastic drinking cups to measure the resin. These mixing cups will not measure components correctly and cause resin curing problems.
- Baltic Day resin doesn't stick to plastic so We recommend to use a hard plastic mixing containers for easy clean up ( wipe them out with paper towel or dry and peel – tip your mixing cups upside down ).
- Adding more hardener to the mixture will not speed up the curing time. Use correct 1:1 ratio to cure accurately. ( Increase the room temperature to encourage curing time ).
- Pour resin and hardener separately, if you uncap both bottles at once, you risk switching the lids ( they will cure closed ).
- Scrape when you stir, not when you pour!
- If you will add more hardener, the epoxy will not cure faster, it will cause excessive blushing and negatively affect cured strengths. Follow the seller instructions.
- Never add water to the epoxy resin – this could have a negative effect on the quality of the finished product. Before working, make sure the mixing container and the stirrers are clean.
Humidity and temperatures of epoxy resin
Resin and hardener is very sensitive to temperatures. If the humidity in the air is above 65% you should close the resin & hardener bottles. Storing the epoxy in a humid environment may cause poor resulsts due to moisture entering the resin mixture ( if you do not use the material properly, get wet while mixing, the quality will suffer ).
Knowing the correct temperature is critical to a successful application. If you won't follow proper heating instructions, uncured resin will leave soft or wet spots, excessive air bubbles and cloudiness in the finish.
Temperature of the synthetic resin and surface on which the mixture is to be poured must be right! If temperature is lower than the temperature of the resin, the curing will be negatively affected. Humidity and Temperature should be constant to achieve great results.
STEP 5: Mix BALTIC DAY resin
The correct mixing of the two components is essential to achieve perfect results. If you do no work carefully, incompletely cured resin will leave the sticky sports. When mixing the resin and hardener, keep in mind that often a lot of material sticks to the edge of the mixing container. This can affect the mixing ratio, do not mix very small amounts of components in order to have enough material available.
Pour the two components together and stir very well, for at least 3-5 minutes. Scrape the sides of the cups as you mix. Incorrectly mixed resin will stuck to the sides and the bottom ( no-mix resin will leave sticky spots and won't harden properly ).
Note: When you stir your resin correctly, it's a great way to prevent bubbles. Sometimes the bubbles will appear, especially if mixing large volumes. You can easily remove these with a Heat Torch after you've poured and spread the resin over your project. Read more about removing bubbles of epoxy resin here.
After your resin is measured and mixed correctly, you are ready to use your resin! Note: you will have 35-45 minutes to spread the resin and remove bubbles before it starts to cure and thicken. Remember to follow instructions, check technical data sheets and safety guideliness before starting your projects!
Use large container for mixing epoxies
When mixing epoxy resin, heat will be generated due to the chemical reactions. You should keep in mind that there is a limit for the mixed amount of components ( cannot be exceeded ).
Mix a smaller amount of mixture twice instead of once. Mixing in a sufficiently large containers will reduce heat and bubbles. Low reactive casting resins will generate less heat.

Tools for mixing Epoxy Resin
The right tool for mixing must have straight sides. This optimal tool will help you to throughly mix even the material that stick of mixing container.
Use a flat spatula or stirring stick for the small quanitites of epoxy resin. For the large amount of epoxy resin, use a bucket with a spout. In this bucket, resin can be mixed with a drill is best choice!
Use only compatible colorants and resin
When mixing products from different manufacturers, unexpected chemical reactions can occur. Therefore, while working with synthetic resin, use all products from one manufacturer.
Not all resin dye are compatible with epoxy. When coloring resin components, is important to use only suitable coloring dispersion agents, color pastes and mica pigments. BALTIC DAY pigments are specially formulated for Resin Art Projects and can be applied to any surface.
Share your own tips & tricks in the comments below!
Comments
Leave a comment