FAST USA 2-5 DAYS SHIPPING
Epoxy Resin Wood Lamp with LED Lights – Tutorial

Resin lamp is a unique and eye-catching home décor. Making an epoxy resin lamp is quite difficult that uses wood and epoxy resin. If you enjoy working with wood, crafts and resin DIY, this project is for you! In this blog we will show the exact step by step tutorial on epoxy resin wood lamps. You will find information which materials are used for this project and what to pay attention to when making your own resin lamps.
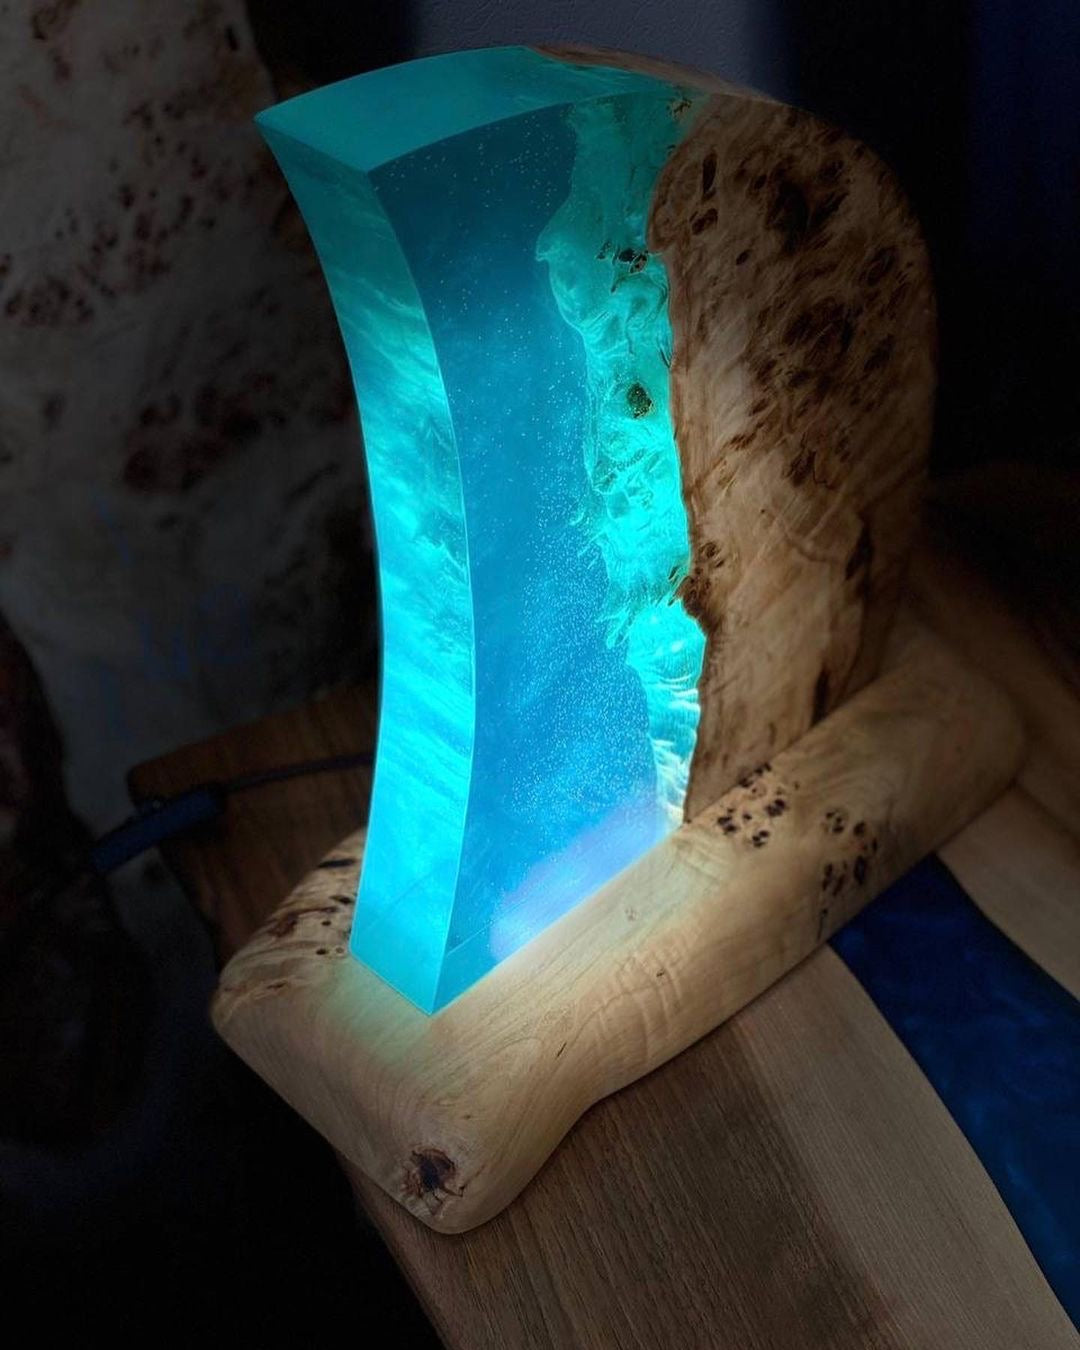
Resin Lamp Idea
Resin art offers a wide range of different applications: from resin jewelry, painting, river tables to epoxy resin wood lamps. The idea of resin lamps came up on Pinterest, Etsy and Instagram. Making your own resin lamp is quite different, it will take some time to get experience and become a master. Resin lamps are expensive but definitely worth investing in this home decoration. All these challenges keep us moving forward and learn more about this beautiful resin art.

What Supplies do I need for Making an Epoxy Resin Wooden Lamp?
- Epoxy Resin
- Suitable Wood ( Oakwood, Acacia, Beech, Mahogany, Walnut, Ash, Roots )
- Wood Varnish
- RGB LED Light
- Module for Light
- Silicone and Hot Melting Glue
- Sandpaper
- Polishing Paste
- Wax for Wood
- Hardener
- Cable

Wood Preparation
Follow these steps to make your first Epoxy Resin Wood Lamp.
First of all, you need to prepare wood. You can buy old wooden stumps at a woodshop or order online. If you are living near the forest, the best option is to gather up old oak or other wood stumps in the forest. The quality is very important, you don’t want your lamp to rot or fall apart over a long period of time. Choose good quality stumps that are not rotten.
After you buy or find the wood, it’s time to cut the wood into the desired shape and size of lamp. You can use a bandsaw to cut the wood. Once the wooden shape is ready, keep it to dry for at least 10 hours ( we recommend 24 hours ).

Wood Preparation Stages
- Simple, Rough Cleaning – use a knife, scraper or brush to clean the mud and bark of the wooden surface.
- Deep Cleaning – after simple cleaning, you will need deeper cleaning. It means, you will need to use an airstream compressor to blow all small pieces of dirty mud from the wood. Surface must be completely clean.
- Finishing – once the wood is dry, you can finally cover the surface with varnish and leave for at least 20-24 hours to dry. It is very important to follow these steps to prepare your wood.

Prepare Epoxy Resin Lamp Mold
Choose the right size of the lamp that you want to make. If the room is very big, try to make a bigger lamp so it can lighten the room. Take Plexiglas and cut it into desired pieces. Once the wood is dried completely, take the clean wood pieces and glue them to the Plexiglas bottom. In the work end, the walls of the plexiglas must be glued together.

Baltic Day mica powder pigments are specially designed for resin art projects. Highest quality Mica powder paints are ideal for tinting epoxy resin.
Adding and Pouring the Epoxy Resin
Now, we need to start working with the epoxy resin. First of all, we need to weigh the resin and hardener separately. Make sure both components are mixed with the right proportions. If you are not sure how much you need to add, double check the manufacturer’s instructions.
After resin and hardener are measured correctly, now you can mix resin mixture thoroughly. Mix everything for about 15-25 minutes and stain it through a filter to remove any dust or dirt.
It’s time to pour the mixture into the mold and place it in the degasser ( 20-25 degrees Celsius or 68-77 °F ). After you take the resin out, leave it to cure for a minimum 2 days.

Finishing Work Structure
The wood lamp is almost ready! After 2-3 days when your resin cures completely, you can finally remove the Plexiglas from the solid work structure. You already made a lamp but it’s not finished yet. Take wood, cut out the bottom and insert the LED light bulbs into here. For this type of lamp, we buy LED lights from a local shop or Amazon with a voltage of 90-240 V. Use a manual milling machine to cut out holes in the wood and glue the LED lights. Don’t forget to make some holes under the lamp to add the cable.

Then you need to join up the underside of the resin work-piece. This is best done with silicone glue and should be left for at least a full day to dry. Now the lamp is ready and dry, but the surface will be a bit uneven and rough. You can amend this by sanding down the entire surface. Start with 60 grit sandpaper, and slowly start to increase the size with each layer of sanding. Eventually, you can finish off the sanding with 2000 grit sandpaper. When hand sanding at the final stages, make the surface of the lamp slightly wet.
After drying, the lamp surface is still rough and uneven. To remove all rough, grind all sides of the lamp using a sandpaper or machine. Start from grit size 60 and increase to 120, 240, 300, 450. You will still need to sand the lamp with sandpaper grit size 1000, increasing to 2000.

Finishing the Epoxy Resin Lamp
The last step – polishing the lamp surface with polishing paste that you can also use on car headlights. After you polished, chafe the lamp with some wax and that’s it! Now you can finally use it as a beautiful home décor! Resin lamp looks ideal!

Here is one more example of simpler resin lamp

Looking for more tutorials, Tips and Techniques?
- My Resin is Tacky – How do I harden Sticky Epoxy?
- Measuring and Mixing Epoxy Resin – Top Tips on How to Mix Epoxy ( GUIDE )
- Is Epoxy Resin Food Safe?
- How to make Epoxy Resin Cutting Board?
- How To Color Clear Epoxy Resin - Best Resin Colorants for Coloring
- How Do I Get Bubbles Out Of Epoxy Resin?
Share your thoughts in the comment below!
Leave a comment